Wednesday, 30 January 2008

WEDDING FAVOUR


Here's my first try at making wedding favours. I used some organza fabric cut in a circle to wrap the almonds inside. I tied it with elastic thread and made a red rose for the top as you can see on the 2nd picture.

Aqui podran apreciar mi primer intento en hacer recuerditos de bodas. Usé una tela de organza cortada en círculo para envolver las almendras que estan dentro. Luego lo amarré con hilo elastico e hice una rosa para ponerla en la parte superior asi como podran ver en la 2da foto.
Tagged

I've been tagged by Martine
Now I'll tell you 7 things about me.

1. I'm an animal lover, I like most animals, specially cats and birds.
2. I speak a little bit of French though it's not great
3. I'm not very talkative and little shy
4. I love riding bikes
5. My favorite dish is ceviche which is a mixture of fish, onions, peppers, lettuces on lemon juice.
6. I'll be starting teaching cardmaking & scrapbooking next week.
7. I love rice!

Here are the rules
Share 7 things about yourself on your blog, then tag 7 people at the end of your post and include links to their blogs. Let each person know that they have been tagged by leaving a comment on their blog.

Now I tag
1. Terrie
2. Lauren
3. Nicola
4. Marlou
5. Patty
6. Gaby
7. Marieke

Tuesday, 29 January 2008

SIMPLE MOTHER'S DAY CARD


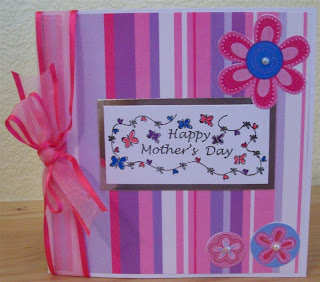
This a a simple not very expensive card. I used wrapping paper for the background, stamped the "Happy Mother's Day" on piece of white card and coloured it with felt tip pens. I also used silver mirror card, organza ribbon to the spine of the card and stickers to embellish it.

Esta es una tarjeta simple y no muy cara. Usé papel de regalo para el fondo, estampé el "Feliz Día de la Madre" en un pedazo de cartulina blanca y la coloreé con plumones. Tambien use carton brillante plateado, cinta de organza y pegatinas para adornarla.

You cheer me up Award


I was given this great award by the lovely Terrie
I'm excited as this is my very first award. Thank you so much Terrie!
Now I'm giving this award to all friendly bloggers who visit my blog.

Monday, 28 January 2008

DRAGONFLY


Here's a simple card made with a large dragonfly peel-off stuck on a piece of fabric. To accent it I sewed some beads on all the dragonfly and stuck the fabric using double- sided tape. I added glitter glue on all the edges of the fabric so it won't fray.

Aqui podran apreciar una tarjeta simple que hice con una pegatina de caballín grande pegasa en un pedazo de tela. Para darle mas enfasis pegé unas perlitas en todo el caballín y pegé la tela usando cinta pegatina doble. Le agregé goma con purpurina a todos los bordes para que la tela no se abra.

Sunday, 27 January 2008

SUMMER BIRTHDAY


This is a page of my last birthday in Peru at my parent's house. I used Papermania Colossal papers and free papers that came with Papercraft Essentials magazine. I made the "25 th Birthday" phrase by sewing beads to a fabric swatch. I also used buttons and diamond sequins on 2 photos and plastic embellisments from craftime.

Esta es una pagina de mi último cumpleaños en Perú en casa de mis papás. Usé papeles de Papermania de la coleción Colossal y papeles que vienieron gratis con la revista Papercraft Essentials. Todo la frase "cumpleaños 25" la hice cosiendo mostazillas en una muestra de tela. Tambié usé botones, lentejuelas en forma de diamante en 2 de las fotos y adornitos de plástico de Craftime.

Saturday, 26 January 2008

SIMPLY QUILLED FLOWER


This is the birthday card I made for Mum to ago along with the Bracelet
I made for her.
I made flower by coiling 6 strips of orange paper and 1 brown for the center. I embossed a cream cardstock for the background with a Cuttlebug Embossing folder and chalked it. The final accent was a piece of ribbon tied to the card.

Esta es la tarjeta de cumpleaños que hice para mi Mami para que vaya junto con el Brazalete que hice para ella.
Hice la flor con 6 volutas sueltas y una marrón para el centro(filigrana. La cartulina crema la puse en alto relieve usando uno de los folders de Cuttlebug y luego le puse tizas. El detalle final fue un pedazo de cinta amarrado en la tarjeta.

Friday, 25 January 2008

LA ISLA AZUL


In this layout I used some pictures that I took on a trip to Cajamarca in the Peruvian Highlands. I embossed some pieces of cream cardstock using a Cuttlebug folder and cut the frames using the X cut cutter and rectangle template. I added some sequins butterflies and stitched part of the title and made the rest with chipboard letters.

En esta pagina usé unas fotos que tomé cuando estuve de viaje en Cajamarcan en la sierra Peruana. Pusé en alto relieve pedazos de cartulina crema usando uno de los folder de Cuttlebug y corté los marcos usando el cortador de X cut y los moldes de rectangulo. Le agregé algunas lentejuelas en forma de mariposa y cosí parte del titulo y el resto lo hice con letras de chipboard (cartón grueso).

Thursday, 24 January 2008

BAGS OF LOVE


A gift bag for St. Valentine's I made with 20 gauge silver wire, assorted beads and 28 gauge red wire. I attached the heart using brads and added a silk flower

Esta es una bolsita de regalo que he hecho para el día de San Valentín usando alambre grueso dorado 20 gauge, perlitas de distintos colores y alambre rojo fino de 28 gauge. Sujete el corazón usando brads y agregé una flor de seda.

Wednesday, 23 January 2008

EASTER RABBIT


Another project for Easter. I decorated the pot with buttons and die-cuts. To make the plants I put some silk flowers on wooden sticks and made the rabbit with pom-poms

Este es otro proyecto para la Pascua. Decoré el macetero con botones y die-cuts. Para hacer las plantas usé flores de seda en palitos de helado de madera e hice el conejo con pompones.

Tuesday, 22 January 2008

EASTER CHICKS


Here's an Easter project I made lately. It's a nest with 2 chicks and 2 eggs. I made the nest from cream cardstock (7 cm wide) cut it strips leaving a 2 cm for the bottom and curled them with a quilling tool. I made the chicks using 2 yellow pom-poms. I quilled the beak and wings and stuck wiggly eyes. I hung the nest with the chicks using nylon on the clear bauble. Finally I used a peel-off border on the surface of the bauble and added a little yellow bow.

Aqui prodran apreciar un proyecto que hice para la Pascua recientemente. Es un nido con 2 pollitos y 2 huevitos. Hice el nido de cartulina color crema (de 7cm de ancho) la corté en tiras dejando 2 centimetros en la base y rizé las tiras con la herramienta para hacer filigrana. Hice los pollitos usando 2 pompones amarillos. El pico y las alas los hice de filigrana y le pege los ojitos movibles. Colgé el nido con los pollitos usando nylon en la la burbuja transparente. Finalmente use un peel-off de borde en la superficie de la burbuja y le agregé un lazito amarillo.

Monday, 21 January 2008

GLITTERATI FUSIBLE SHEETS & FILAMENTS

Flying Butterflies


Pink Heart


Sparkly Love


Flowers for Mum


Simply Thank you


Fusible sheets and Filaments


I tried these products on my cards for the 1st time and like the results. The Glitterati Fusible Sheets are like a thin plastic in which you can stamp using Stazon and hot iron (not steam) and the same process is used with the filaments which look a little bit like fibres.
You ink your stamp with Stazon then put a pieces of the fusible sheets or filament; add a piece of grease proof paper on top and finally put a hot iron on top and press it for a little while. You'll know your image is ready when you can see it showing through the greaseproof paper. You can use it as a accent on a stamped imaged or used it on layers like I did on the Flying Butterflies and Pink Heart cards

Sunday, 20 January 2008

MY CAT HOT PAWS


Thought you might like to see my cat Hot Paws having a play on my craft table this morning. She loves sitting on my craft table and have a look at my crafty goodies.

Pense que les gustaria ver esta foto de mi gata Hot Paws jugando en mi mesa de manualidades esta mañana. A ella le encanta mi mesa de manualidades y echarle un vistazo a mis cositas

Saturday, 19 January 2008

ROSE BORDER


This is simple card in which I stamped the sentiment using the Whispers pens from PaperMania. I added some gold glitter glue, cut and oval border from the Colossal papers - Citrus Collection and stick some of my paper roses.

Esta es una tarjeta simple en la que estampé el mensaje usando los plumones Whispers de Papermania. Le agregé purpurina dorada, corte el borde oval de los papeles Colossal - Citrus Collection y pegé algunas de mis rosas de papel.

Friday, 18 January 2008

CRYSTAL WATERS


This is my lastest jewelry made. I made this bracelet for my Mum's coming birthday in February. I used 0.5 mm silver wire and clear glass beads I brought from my last trip to Peru. All made with Macrame knotting.

Aqui podran appreciar mi ultima pieza de joyeria. Hice este brazalete para el cumpleaños de mi mami que ya se viene en febrero. Usé alambre plateado de 0.5 mm y cuentas de vidrio transparente que traje de mi ultimo viaje a Peru. Toda esta hecha con los nudos de Macramé.

Thursday, 17 January 2008

FABULOUS DRESS


I made this card for my sister. Since she loves dress making I used this dress stamp from See D's and color it with permanent pens and embossed it with clear embossing powder 4 time to create a glazed effect. I wrapped some seed beads on the stamped image and added some stickers and peel-offs.

Wednesday, 16 January 2008

QUILLED HEART


I made this card using the thin quilling papers. I also made some fringed mulberry flowers and roses from organza ribbon. I colored a gold peel-off with the whispers permanent pen and and used some alphabet that came free with a magazine a while ago. I matted and layered with mirror silver card, purple and white. Finally I added some beads to one side in different colors of pinks, lilacs and clear.

Hice esta tarjeta utilizando los papeles delgados para filigrana. Tambien hice algunas flores con papeles "mulberry" y rosas con cintas de organza. Coloreé la pegatina dorada con los plumones permanetes de Whispers y usé algunas letras que me vinieron gratis con una revista hace un tiempo. Para el fondo use carton brillante plateado y cartulina morada y blanca. Finalmente agregé algunas mostazillas a un lado en colores rosado, lilas y transparentes.

Tuesday, 15 January 2008

GATITO CON FLORES


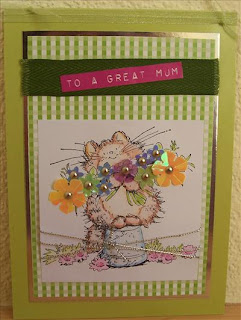
One of my favourites from the Penny Black stamps. I love this cat. I used watercolors to color the image and added some flowers sequins attached with brads. I also tied a piece silver cord at the bottom of the card and put ribbon on the top.

Uno de mis favoritos de los sellos de Penny Black. Me encanta este gato. Usé acuarelas para colorear la imagen y agregé lentejuelas en forma de flores sujetadas con brads. También le amarré un cordón plateado en el fondo y le puse cinta en la parte superior

Monday, 14 January 2008

BLUE WAVE

Earrings


Pendant


These are the matching earrings and pendant I made for the watch
I post last week.

Estos son los aretes y pendientes que van a juego con el reloj
que publiqué las semana pasada.

Sunday, 13 January 2008

BEADS & BUTTERFLIES


A card I made combining punching and beading. I used a fabric swatch to sew the beads and punched shapes. I also used elastic gold cord and attached some more punched shapes to it.

Esta es una tarjeta que hice combinando las formas perforadas con mostazillas. Usé una muestra de tela para coser las mostazillas y las formas perforadas. Tambien usé un cordon elastico dorado y le agregé mas formas perforadas.

Saturday, 12 January 2008

LOVE LETTERS


Here's a card I made using beads, gold thread, sequins and bugle beads. A template helped me to cut out the letters with scissors. I sew the beads, sequins and bugle beads and threaded the gold thread to the heart.Finally I added organza ribbon and 2 plastic hearts.

Aqui podran apreciar una tarjeta que hice con mostazillas, hilo dorado, lentejuelas y canutillos. Las letras las corté con tijeras con la ayuda de un molde. Cosí las mostazillas, lentejuelas y canutillos y le pusé el hilo dorado al corazón. Finalmente agregé cinta de organza y 2 corazones de plástico.

Friday, 11 January 2008

PIMENTEL PARK


I've just finished this layout. I made it using K&Co Papers again and some of my favorite photos of me the time I went to Pimentel (Peru) on the 1st of January.
I also used beads and sequins to accent borders of the pictures and hand stitched the title with buggle beads.

Acabo de terminar esta pagina. La hice utilizando papeles de K&Co nuevamente y algunas de mis fotos favoritas de la ultima vez que fui a Pimentel (Peru) el primero de enero. También use perlitas y lentejuelas de formas para acentuar los bordes de las fotos y cosi a mano el titulo con canutillos

Thursday, 10 January 2008

TINTO & PARRILLA


WIRE WORD CLOSE-UP


WIRE EMBELLISHMENT


TAG CLOSE-UP


I used K & Co papers for this layout. I made the title of this page myself using 24 gauge wire, round nose pliers and a few beads. I used ribbon behind the wire words (Tinto & Parrilla was the name of the restaurant) This is my first try at making wire words. I also make the wire border which is to one side of the picture; I used 28 wire for this so it will be very easy to bend and make some Macramé knots with it. I also used beads for a extra sparkle and attached it to the page with brads. Finally I added a chipboard tag, faux stitches on it with a pen and a little bit of doodling.

Para este layout usé papeles de K & Co. Hice el titulo de esta pagina yo misma usando alambre delgado de 24 gauge (0.5 mm, tenazas con puntas redondeadas y unas perlitas. Usé cinta detras de estas letras (tinto y Parrilla es el nombre del restaurant) Esta fue mi primera vez haciendo palabras con alambre. Tambien hice el borde de alambre que esta a un lado de la foto; Use alambre de 28 gauge (0.3 mm) para que asi sea mas facil doblarlo y hacer los nudos de Macramé. Tambien usé unas perlitas para darle brillo extra y lo puse en la pagina usando brads. Finalmente le agregé una etiqueta de carton, costuras falsas que hice con plumón punta fina y un poquito de doodling.

Wednesday, 9 January 2008

LIGHT-BLUE WATCH


This my latest creation. I bought the watch face at my local craft shop and used tiger tail thread to make the handles. I also used some light-blue glass bead and a few Macramé knots. I'm really pleased with the result.

Esta es mi ultima creacion. Compré la cabeza del reloj en mi tienda local de manualidades y usé el hilo llamado "cola de tigre" para hacer las manijas. Tambien usé algunas piedras de vidrio celeste y unos nudos de Macramé. Estoy muy complacida con el resultado.

THE LAST CHRISTMAS CARDS OF 2007


I didn't get the chance post these ones before Christmas was over so here they are. As you can see most of them have beads on them. Love the sparkle of beads!

No tuve la oportunidad de publicar estas tarjetas antes de que la Navidad acabase asi que aqui estan. Como podran ver la mayoria tiene perlitas y piedritas. Me encanta el brillo extra que tienen las perlitas.

Tuesday, 8 January 2008

BROWN MACRAME BAG


This a bag a made some time ago but using the same technique (Macramé) as in the other bags I post in here.

Este es un bolso que hice hace un tiempo usando la misma tecnica (Macramé) que usé en los otros bolsos que publiqué aqui.

Monday, 7 January 2008

FLORAL BIRTHDAY


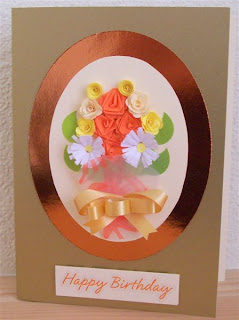
More flowers for you but this time is a happy birthday card. I made the roses from the center with strips of paper as I have described before in previous step by step.
Click on the link to see it. Paper Roses

I also made fringed flowers and used the Oval template and cutter from Xcut to cut the cardstock for the background. Finally I used a sticker this time for the greeting.

Mas flores para Uds pero esta vez es una tarjeta de cumpleaños. Hice las rosas del centro con tiras de papel asi como las habia descrito en un "paso a paso" anterior.
Haz click en el link para verlo. Paper Roses

Tambien hice flores con flequillo y usé el stencial Oval y cortador de Xcut para cortar la cartulina del fondo. Finalmente usé una pegatina esta vez para el saludo.

Sunday, 6 January 2008

FLORAL THANK YOU


Another card featuring more paper roses and flowers. I used the Xcut cutter and square rectangle template to cut the carstock for matting and layering. I also used some ribbon and some cellophane I kept from some flowers my husband brought me a while ago. The "thank you" was stamped using the Whispers pens. I colored directly to the stamp using orange and brown tones and then stamped on the cardstock.

Aqui podran apreciar otra tarjeta que esta caracterizada por el uso de flores y rosas de papel. Use el cortador de Xcut y los stencils de rectangulo para hacer los rectangulos del fondo. Tambien use algo de cinta y celofán que guarde de las flores que mi esposo me trajo hace un tiempo. El "thank you" lo estampé usando los Whispers pens. Coloreé el sello directamente usando tonos naranja y marrón y luego estampé la cartulina.
Related Posts with Thumbnails

Collage of My Macramé Bags

Collage of My Macramé Bags
Made when I was in Peru